I'll try to keep you updated on progress by posting photos as we go along. Check back regularly to see our progress from start (bottom of page), to our current progress (top of page).
 |
Sanded, teak is stripped and ready to be masked.
|
 |
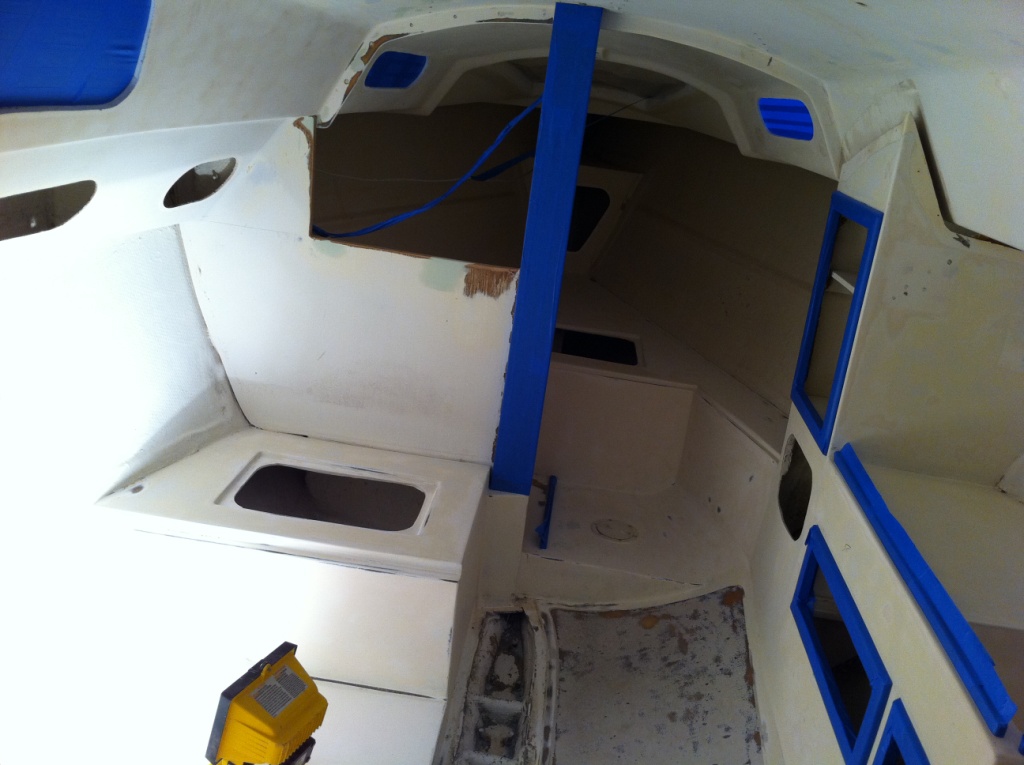
Bulkhead is cut out to open cabin up. Holes are patched and sanded smooth, masking is underway.
|
 |
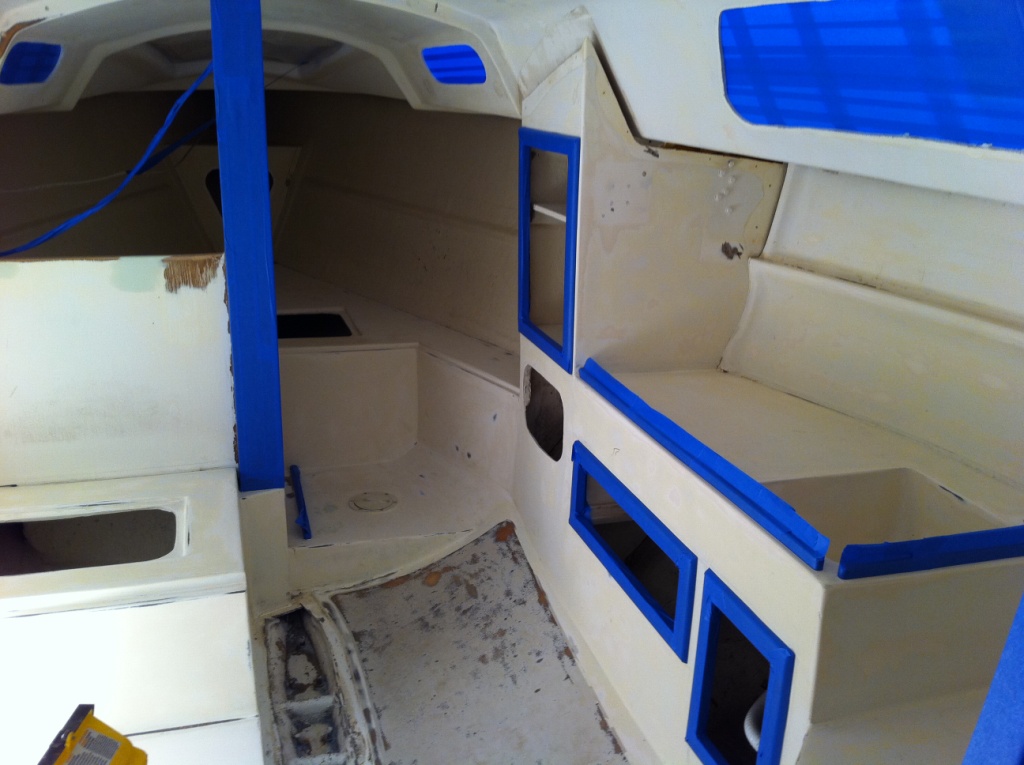
Benches, floor, v-berth, all sanded and waiting for primer.
|
 |
Looking aft... the quarter bert was a bear to sand and prep for painting. A close examination may reveal a few holidays.
|
 |
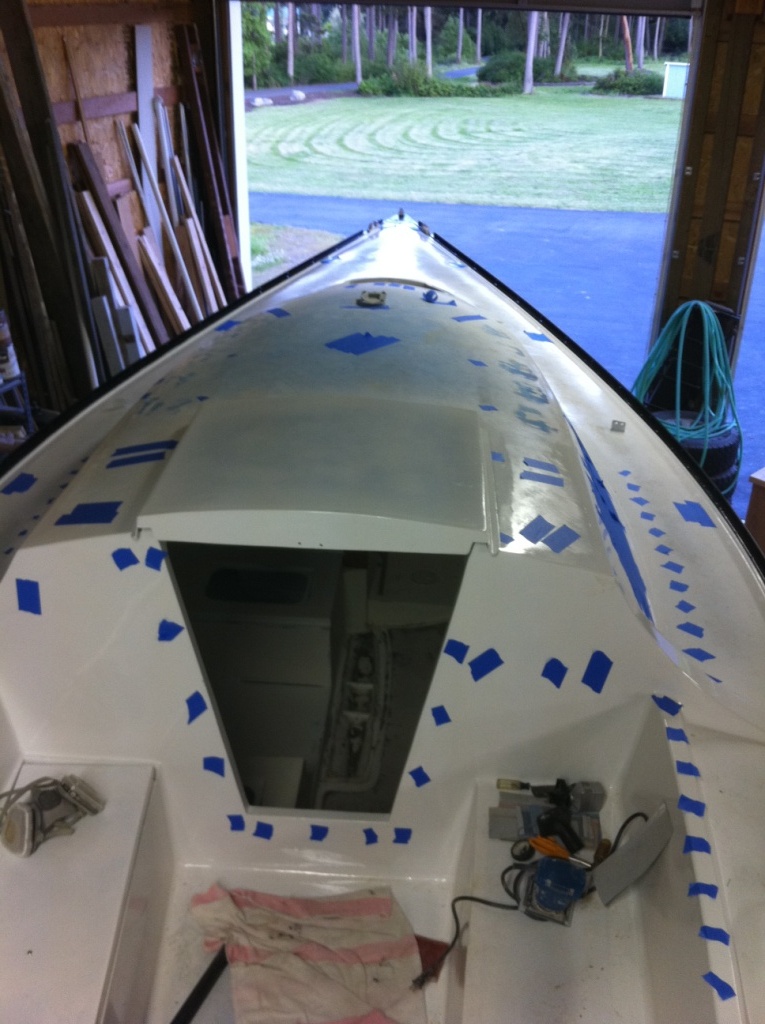
Completely masked off, windows covered, and ready for primer.
|
 |
My fume filled oven for the next couple of days.
|
 |
To prevent atomized paint from making its way through deck screw holes, every single one was masked off.
|
 |
First coat of primer went on nicely. Sprayer worked like a charm.
|
 |
Even with just primer sprayed, it is looking a world better.
|
 |
First coat of
Awlgrip Cloud White laid on. You can already begin to see the hard
glossy finish that will be left after a couple more coats.
|
 |
Second coat on and looking terrific!
|
 |
Second coat over settee and hull wall.
|
 |
Two coats in v-berth and ceiling. Three on all smooth surfaces to give it that extra glossy goodness.
|
 |
After three coats on the galley, walls, cabintop sides, and settee and quarter berth... I am ready for a break!
|
 |
This boat project is really aging me... my hair turned gray in a matter of hours!
|
 |
Masking tape
removed revealing a lovely finished product. Nice, smooth paint lines,
solid covering, and only a few minor runs. I am very pleased.
|
 |
V-berth is much more inviting. Once the new cushions go in, this baby will be a weekenders dream.
|
 |
You can see the high gloss finish of the walls here. Shiny and easy to clean.
|
 |
Amidship looking aft. You can see the holes where compass, knotmeter, and depth sounder were are filled, faired, and pretty.
|
 |
| The galley area and teak trim around cabinets is in pristine condition and ready for a final touch. |
 |
Having the bulkhead between the settee and the trim reduced in size really opens the cabin up and makes it feel less cramped.
|
 |
| Getting everything masked off and covered in plastic so I spray the toe rail. |
 |
| I wasn't quite
done masking yet, but I do like the "seahawks" colors of tape I used,
It got me thinking about an absolutely wild paint scheme. Fortunately,
my better sense has prevailed and we'll stick with the classic white
hull. |
 |
| I had to be
sure to completely cover my newly painted hull sides and bottom. at
$300+ per gallon, the baltoplate must be defended at all costs. |
 |
| Toe rail is all masked off and ready for cleaning and first coat. |
 |
| All the shiny Awlgrip topside paint is covered so it stays shiny! |
 |
| After one coat... not too bad! |
 |
| After second coat... looking good! One more and that should do. |
 |
| Third coat is
sprayed and set overnight. The enxt day when I come back, I have to
score the edge of the tape so it releases without tearing. |
 |
| It is a good thing I used plastic... before I sprayed, this plastic was completely clean! |
 |
| Masking wasn't terribly difficult for the toe rail... it wasn't terribly easy either though. |
 |
| Finished! Tape off, looking good. |
 |
| Like with most things in life, it isn't perfect. I know of a couple small steaks, but for the msot part, it is great! |
 |
| Vioala! It is starting to look like a boat again! |
 |
| After some wet sanding and burnishing, that reddish brown bottom should look slightly more gray. |
 |
| Beginning to
tape off the toe-rail for paint. I kinda like the blue/green stripes at
the toe-rail. It could be a seahawks theme. |
 |
| Such a pretty boat. I love it. Ready to move it out and clean up. |
 |
| After applying 5-6 coats of Interprotect 2000e, I sanded it smooth and prepared to apply bottom paint. |
 |
| Sanding
the rudder smooth. After sanding the hull overhead, laying this baby
down on the workbench was like a walk in the park... a very dusty park. |
 |
| With
Craig and his tractor's help, I rolled the trailer and boat out of the
shop so I could clean up the shop and blow off the trailer and boat. |
|
|
|
 |
| This is about the most expensive pile of dust around. I estimate about
$30-$40 worth of Barrier Coat found its way onto the floor via some
80grit and my ripped elbows and shoulders. |
 |
| Once I blew off the trailer, I set to washing down the bottom with Interlux special solvent 216. |
 |
| It was a bit breezy when I rolled out of the shop. My 1mil plastic was blowing around like a... well... like a sail. |
 |
| Supposedly this stuff burnishes to a metallic gray... we'll see. |
 |
| Here it is, Interlux Baltoplate Racing bottom paint. Good $tuff. |
 |
| Midway
through my first coat of Baltoplate. You can see the "attempt" at
spraying on the plastic above the waterline on the port bow. Once I gave
that up, it went on quite nicely with the roller. |
 |
| This
certainly isn't the worst "coating" that I've had over the last four
months, but it did get a bit closer to my eyes than is generally
recommended. Oh well... it washed off and I was no worse for the wear. |
 |
| Looks
a bit different with a gray bottom... I kinda like it. The baltoplate
will burnish to a grayish brown, but it won't be this sharp. |
 |
| The
keel after many many applications of fairing compound... you
can see it took a little practice to be able to lay it on smooth and
thus avoid horrendous sanding. |
 |
| The man who mad it happen for me... Mitch. Thanks for all your help! |
 |
| Nearing completion. It may not look pretty, but it sure feels pretty! |
 |
| Foil is pretty close to spot on from top to bottom (according to the CAD drawings anyway.. wherever those came from) |
 |
| A couple blisters had to be "dealt with". In this case I removed the de-laminated area and re-glassed then faired smooth |
 |
| Patch job once it had set up, before I set to sanding and fairing. |
 |
| Taped off and ready to start applying barrier coat. |
 |
| While I was waiting for my first coat of Interprotect 2000e to dry, I finished fairing the rudder. |
 |
| First white coat of interprotect is applied. Had a few runs while I was getting used to the way it laid down. |
 |
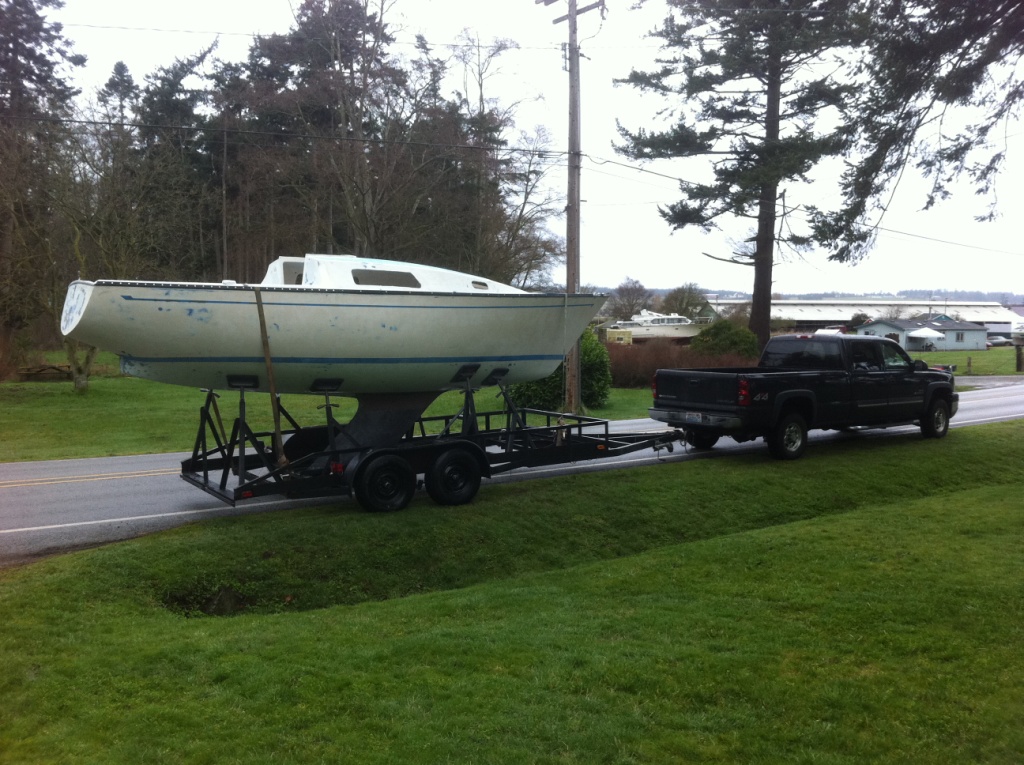
| A borrowed boat on a borrowed trailer in a borrowed garage. Man, I've got great friends! |
 |
| My beautiful keel looks much better when it is all one color! |
 |
| I wonder if the keel will ever be the difference between 1st and 2nd place? |
 |
| First coat of gray interprotect is on. You alternate between gray and white so you can see where it isn't thick enough. |
 |
| Half done with my third coat! |
 |
| Rudder has two thick coats on and expect to lay at lease three more down. |
 |
| In order to get the keel up to temperature to apply filler, I had to tent off the entire boat. |
 |
| The first few layers of filler were high strength with fiberglass added. This makes for a strong underlayment but is terrible sanding. |
 |
| If I had known how terribly difficult the filler would be to sand, I would have tried a bit harder to get it smoother! |
 |
| My first gallon of fairing compound is gone. Wow... that went fast, and I still have a long way to go before the keel even begins to resemble the templates! |
 |
| Cockpit sprayed out with new Awlgrip two part high gloss epoxy. It looks great! |
 |
| It looks nearly as good as I imagine it did rolling off the line forty years ago. |
 |
| Top sides and hullsides are painted, ready to get a washdown and go into the show for more bottom prep. |
 |
This may explain why I always seemed to point better on
a port tack... |
 |
| The keel is now relatively straight and should result in better overall upwind performance... right?? |
|
 |
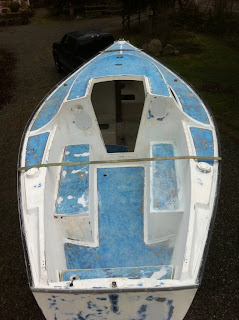
On top is the old paint and non skid that was removed using a disc sander.
The light blue below that is the original color. |
 |
| A
fine white powder coats everything in sight as sanding has progressed
from sanding blue decks and sole, to sanding white vertical surfaces and
cabin top. Pay no attention to my messy workspace... |
 |
| Stanchions,
bow pulpit, t-track, windows... all gone! This makes for easy sanding
for sure and I'm certain it will make the painting all the easier as
well. |
 |
| Blue
and white powder coats everything in sight! We're planning to cut the
bulkhead between the galley and the v-berth in half to open it up. I've
seen this on a few other SJ24s and I really like the way it looks...
stay tuned. |
 |
| The
sink is still filled with water bottles and PBR from our last sailing
adventure... both have come in handy on more than one occasion... you
just have to be sure and run the shop-vac over it a time or two... |
 |
| I
sure like the look of a bare top... would it be the end of the world if
I left the handrails off the top of the cabin? (feedback on this
appreciated!) |
 |
| I
made four large blocks to help raise the height of the boat above the
trailer. This allowed me to finish sanding the bottom under the pads as
well as grind off the rest of the mussels, seaweed, barnacles and paint
from the very bottom of the keel which had been sitting on the trailer. |
 |
| Using my blocks, I was able to get about 8 inches of clearance below the keel. |
 |
| About half way down the port side in this pic. You can see the gel coat
(off white) on left and the white paint that is being sanded off on
right. |
|
 |
| Once the hull is sanded all the way around, it will be on to the top... |
|
 |
| I'm still going to take the rudder off and do some finish sanding by
hand, but I was able to get most of it done while the rudder was still
on the boat. As you can see, it is in surprisingly good shape. |
 |
| The keel down to bare lead. At the top of the keel, where it meets the
fiberglass hull, there is a section where it is "welded" together so to
speak, with a fiberglass filler. I'll sand this down when doing the rest
of the fairing. |
 |
| The keel after sanding off paint and primer. What you see here is, I believe some type of filler. |
 |
| The keel before sanding off ablative paint and primer. |
 |
| Gel-coat was pretty thin in some places resulting in a bit of
fiberglass showing through. A thick coat of primer before we paint and
she'll be smooth as glass! |
 |
| On my friend Mitch's trailer in my neighbor's barn with work
underway. Sanding down to gel-coat on bottom and preparing to fair the
keel. |
 |
| All tucked away nicely under cover...ready for a transformation. |
 |
| What if a strap breaks??? Thankfully they both held! |
 |
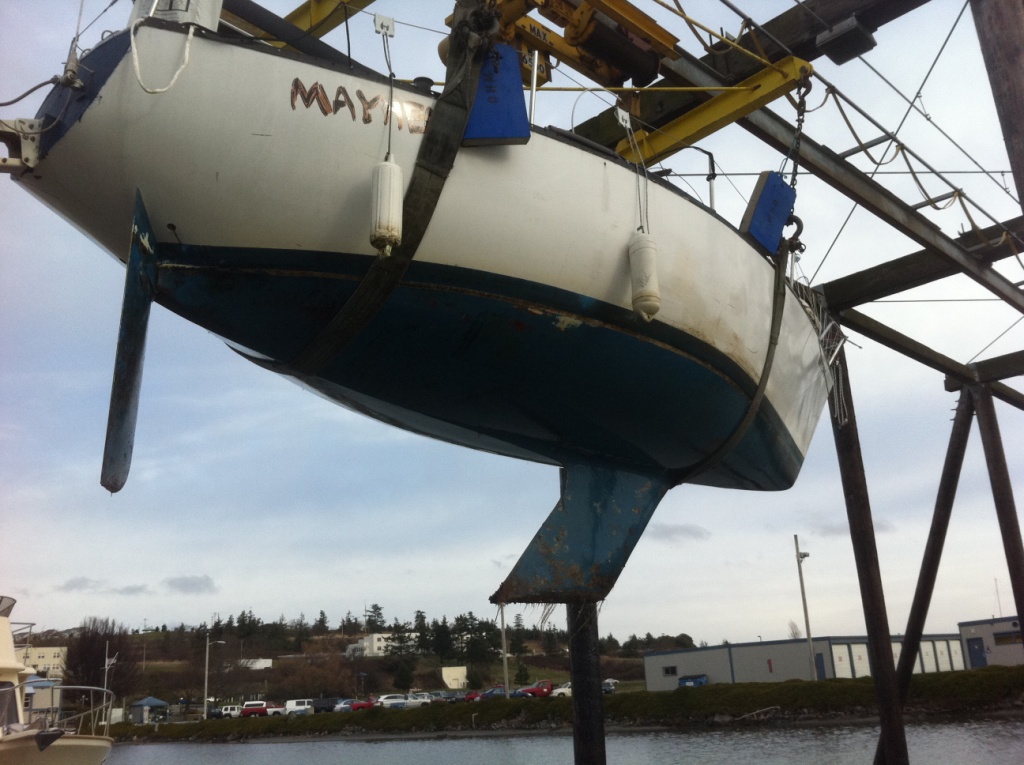
| Once on the sling, we were able to see the condition of the bottom. Not as bad as many boats parked in the marina, but not nearly what she'll be when she goes back in this spring! |
 |
| Mast and rigging off and siting on top of the boat. An exciting day! |
 |
| Mayhem! coming out of the water at Oak Harbor Marina. She's ready for a makeover as you can see! |
 |
| Flying my new spinnaker in Northern Century! What a beauty! |
 |
| The maiden flight of my new racing sails (Ullman Fiberpath)... a
beautiful sight! This was on day 1 of the Anacortes Yacht Club's,
Northern Century race through the San Juan's. |
 |
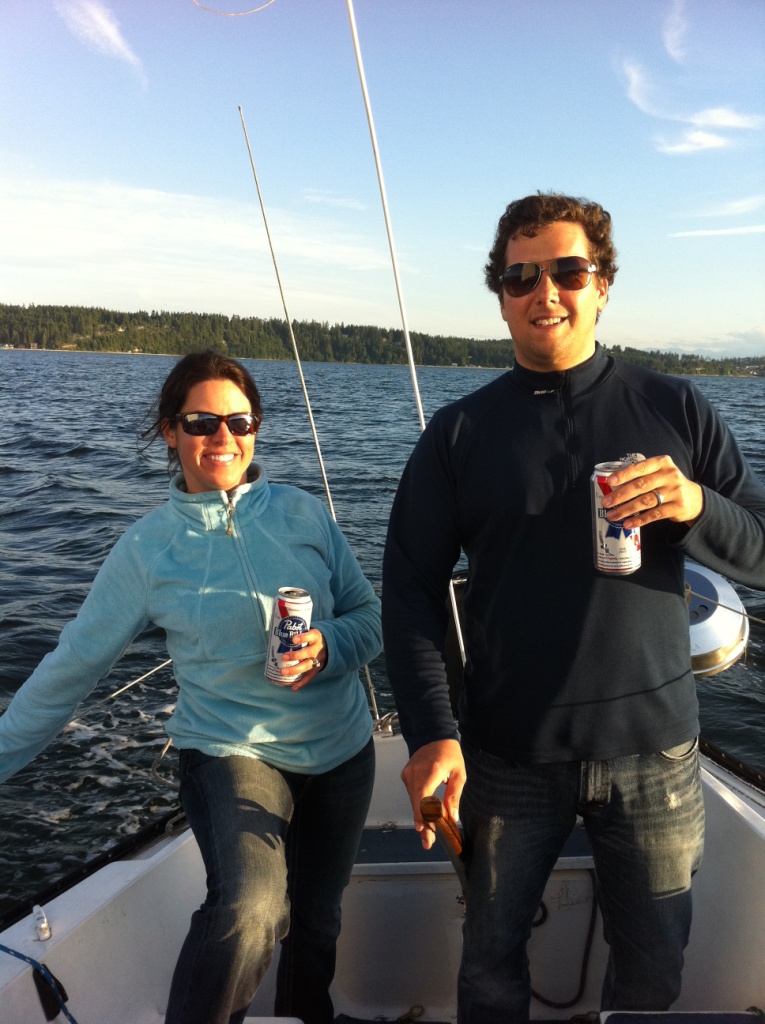
Dan and Amber (my partners in the boat) enjoying a refreshing beverage
and soaking up some of that illusive Pacific Northwest sunshine!
 |
| Me, at home on the boat... no better place to be. |
|
|
 |
| After the trip up from Everett to Oak Harbor, it was quite evident that the bottom needed a good cleaning. I donned my scuba gear and got to work. About a basketball size clump of mussels ran along the bottom of the boat, along the entire keel and all the way down the leading edge and bottom of the rudder! What a mess! |
|
 |
| Here is "Warsawa" preparing for her first night in the Oak Harbor
Marina, safe and sound with all the other SJ24s on "San Juan Ave". |
 |
| The day that I sailed the boat from Freeland to Oak Harbor, Craig was my
"1st mate". Here he is as we pull out of Holmes Harbor. |
|


9 comments:
I welcome all of your comments! Please share your thoughts on our progress or any helpful tips you may have!
Hi Honey, Good job so far. I know you are working hard on this project and am sure you will win many races in the future. I will be cheering you on from the shore. :)
We are all blessed.......your words and your pictures.......thank you Jason. The bottom looked amazing.....good job on the dive!! ;( the sails brought tears :) ....Has your dad been out for a sail yet? Thank You to Our Heavenly Father's blessing's. As we bless others, however we chose, we are blessed.
The ability to dream and live and love and.. .....ok .....Your Awesome
Tina, I will be happy to plan a day with you while Jason is racing, or working, or restoring, ....and your not in school, or church, or MK, .....I miss you both.
Some people get addicted to bad things in their 20's. Boat's aren't bad............just expensive!
Good Luck Jason
Cap Craig
Jason, since you're going all the way down to gel coat, and I'd imagine drying/repairing blisters, you should absolutely spend the time putting an epoxy barrier coat on before painting.
interprotect is what i used on my sj 24 this fall ^
Looks great man, Im Michelle Martin's husband, we met at your HS reunion last year. Keep the blog rolling!
Hi Jason,
Just buzzed through all the photos. Beautiful ... just beautiful. Looking forward to the ride!
Ron
Absolutely the best article on the San Juan 24 to date. About to dry dock my SJ24 and building a trailer to complete this mission. Needed to see the relationships boat to trailer. Even more so at this swept keel. Width of the keel was critical. You saved the day. Thank you so much for the work you put into this article.
Post a Comment