Sunday, May 20, 2012

Cabin stripped, sanded and sprayed!

As the work has progressed on Mayhem! over the lat four and a half months, the majority of the work and the improvements have been to her exterior. Now... we all know that what is on the inside matters more than what is on the outside... and each time that I peered down below, I was reminded how truly ugly Mayhem was.

With a half gallon of Awl Grip left from painting hullsides and topsides, I thought I might be able to do something about it. The only problem of course was to get decent results on an a product like Awlgrip, you have to put serious effort into pre-work. What does that mean?? MORE SANDING!!! Uggg... gag me with a barbie-doll.

Some previous owner of Mayhem had painted over everything inside. Including perfectly fine teak trim, hardware, wires, and anything else that got in the way of his roller. Because I ddin't know what type of paint it was, I had to take it all off. Down to gel-coat we go.

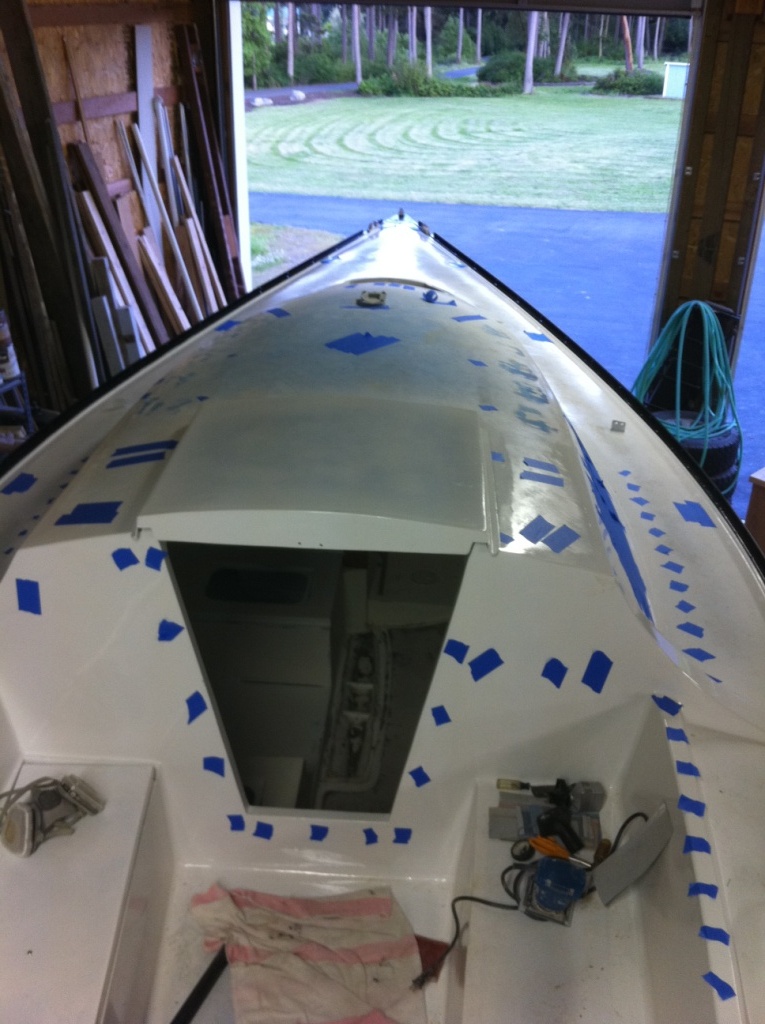
Starting with 80 grit, then going to 150  produced results good enough for who it's for and I then set to cleaning up. Once I masked off all the teak , I taped over windows, hatch, and all the screw holes that go through the deck. Anywhere that atomized primer or paint may find its way out onto my shiny topsides was closed off. The unfortunate consequence is extremely poor ventilation during the spraying... but hey... I have a billion or more brain cells right?A TSP washdown and she was ready for primer. I sprayed 545 Epoxy primer all over everything on the inside.

After letting the primer cure overnight I was quite pleased with the mid-way look of the cabin. Of course.... what would a project be without MORE STINKING SANDING. Using 220 grit, I sanded down everything that was supposed to be smooth (some sections of the hull interior are "unfinished" and do not sand well. I left those. )Well... 220 grit paint dust is fine stuff and it took forever to get the inside thoroughly cleaned. I started with a thorough shop-vaccing, then a TSP wash down, then more vacuuming.A second TSP wash down and an overnight dryout and she's ready to spray.

By the time I had paint mixed and practice my sprayer settings and patterns, more dust had settled on horizontal surfaces in the cabin and it was no longer smooth. Another quick washdown with acetone did the trick.

Finally... the magic happens! My HVLP sprayer was set at about 55PSI. 1.4mm tip and paint thinned 25%. After a thin "mist coat" I let it flash off for 35 minutes. Spraying in the bow and v-berth was very challenging, and unfortunately, a close inspection of the forepeak will reveal no shortage of "hollidays", but this is a lightly traveled area of the boat and I am not overly concerned.

The second and third coats went on fairly "wet" and by the third coat, I was unable to see much of anything but the beautifully glossy sheen of Awlgrip Cloud White.

This afternoon's adventure to the shop where Mayhem is being transformed was quite a joy. The paint has set up and turned out splendid. There are a few places where I have runs and a couple places where it isn't quite thick enough but for the most part it turned out excellent and I am 95% satisfied. I am feeling more and more confident with the sprayer and had I done the Toe Rail, Cabin Primer, and Cabin Topcoat, prior to the barrier coat and bottom paint, I likely would have tried with more earnest to spray those coatings on the bottom rather than roll them. This would have saved me more.... sanding.

Now I am working on taping off for non-skid. I hope to be done with non-skid by mid-week and starting to bed hardware next weekend. I really am starting to see the light at the end of the tunnel, but unfortunately, I do still have to sand and burnish the bottom. 

Here are some great pictures of the transformation!

Sanded, teak is stripped and ready to be masked.

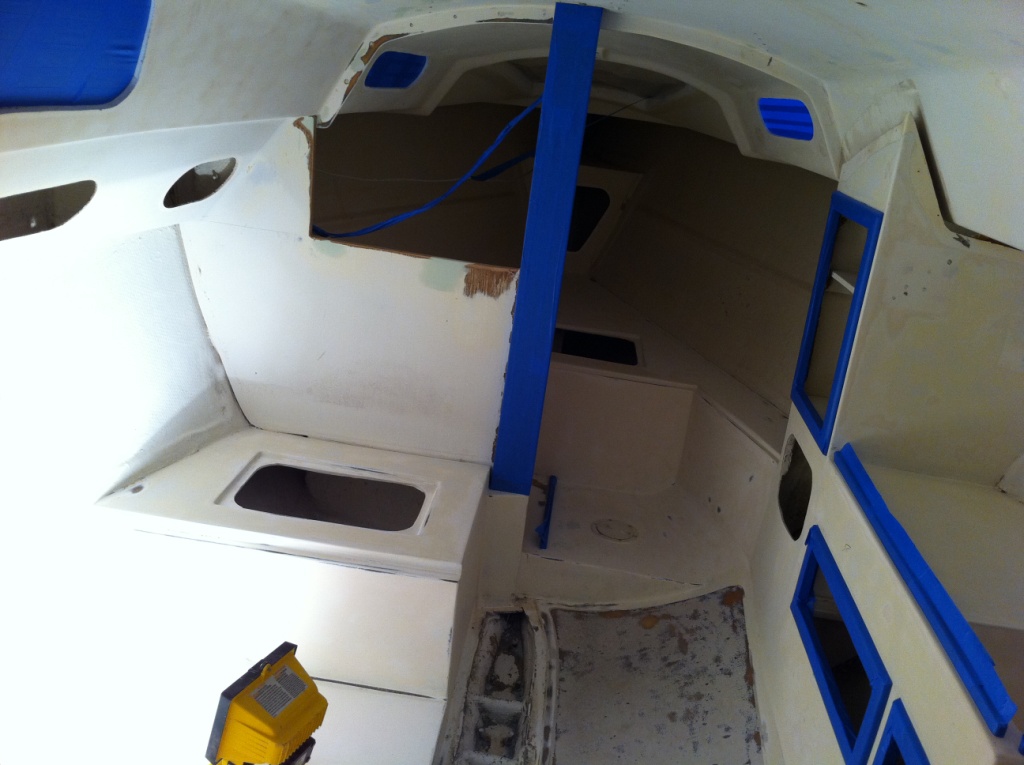
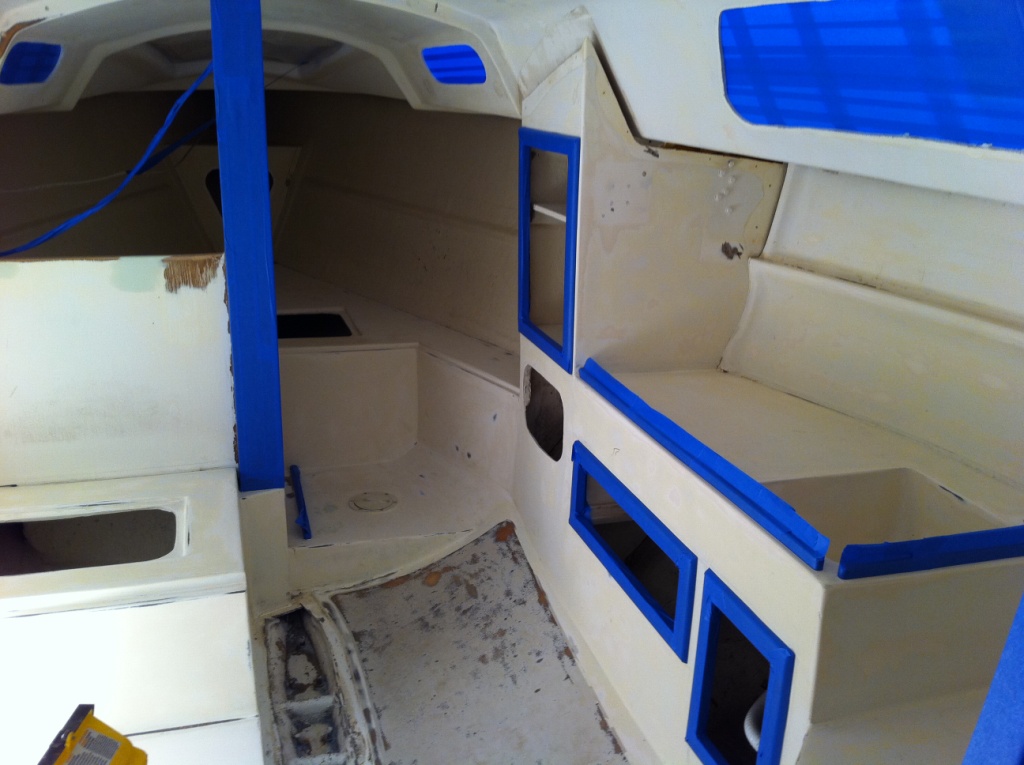
Bulkhead is cut out to open cabin up. Holes are patched and sanded smooth, masking is underway.

Benches, floor, v-berth, all sanded and waiting for primer.

Looking aft... the quarter bert was a bear to sand and prep for painting. A close examination may reveal a few holidays.

Completely masked off, windows covered, and ready for primer.

My fume filled oven for the next couple of days.

To prevent atomized paint from making its way through deck screw holes, every single one was masked off.

First coat of primer went on nicely. Sprayer worked like a charm.

Even with just primer sprayed, it is looking a world better.

First coat of Awlgrip Cloud White laid on. You can already begin to see the hard glossy finish that will be left after a couple more coats.

Second coat on and looking terrific!

Second coat over settee and hull wall.

Two coats in v-berth and ceiling. Three on all smooth surfaces to give it that extra glossy goodness.

After three coats on the galley, walls, cabintop sides, and settee and quarter berth... I am ready for a break!

This boat project is really aging me... my hair turned gray in a matter of hours!

Masking tape removed revealing a lovely finished product. Nice, smooth paint lines, solid covering, and only a few minor runs. I am very pleased.

V-berth is much more inviting. Once the new cushions go in, this baby will be a weekenders dream.

You can see the high gloss finish of the walls here. Shiny and easy to clean.

Amidship looking aft. You can see the holes where compass, knotmeter, and depth sounder were are filled, faired, and pretty.

The galley area and teak trim around cabinets is in pristine condition and ready for a final touch.

Having the bulkhead between the settee and the trim reduced in size really opens the cabin up and makes it feel less cramped.

Saturday, May 19, 2012

Toe Rail Painted

When we bought Mayhem! (then called Warsawa), the toe rail was a little bit of white, a little bit of black, a little bit of blue, and a lot ugly. This, like everything else on Mayhem! was sand and cleaned, sanded and cleaned until it was relatively smooth, loose paint was removed, and it was for the most part ready to have new life atomized and sprayed onto it. When priming the hullsides and the topsides, it was decided not to mask the toe rail and establish a decent base coat over the sanded alumunim on which to apply a nice black top coat.

I am not quite sure why, but for the Toe Rail I decided to go with a one part paint. Based on the recomendation of the guy at the paint booth at Fisheries Supply in Seattle, I purchased Interlux Brightside. It went on relatively easy with my HVLP sprayer and 1.8mm tip, thinned about 15%. Although it has cured relatively hard, there were some scuffs caused before it had totally set up and even since then, it has not taken my rough and tumble ways up and down the ladder all that well. I believe I may soon regret using a one part paint for the toe rails when the paint rubs off. Oh well. If it rubs off, we'll just have to "anodize" it next winter when it comes out again.

The end result is an excellent looking toe rail that really finishes off the hullsides of the boat quite nicely. Once the non-skid is down on the topsides, the final piece should be in place for the exterior of Mayhem!. Other than all of the hardware of course.
Getting everything masked off and covered in plastic so I spray the toe rail.


I wasn't quite done masking yet, but I do like the "seahawks" colors of tape I used, It got me thinking about an absolutely wild paint scheme. Fortunately, my better sense has prevailed and we'll stick with the classic white hull.

I had to be sure to completely cover my newly painted hull sides and bottom. at $300+ per gallon, the baltoplate must be defended at all costs.

Toe rail is all masked off and ready for cleaning and first coat.

All the shiny Awlgrip topside paint is covered so it stays shiny!

After one coat... not too bad!

After second coat... looking good! One more and that should do.

Third coat is sprayed and set overnight. The enxt day when I come back, I have to score the edge of the tape so it releases without tearing.

It is a good thing I used plastic... before I sprayed, this plastic was completely clean!

Masking wasn't terribly difficult for the toe rail... it wasn't terribly easy either though.

Finished! Tape off, looking good.

Like with most things in life, it isn't perfect. I know of a couple small steaks, but for the msot part, it is great!

Thursday, May 10, 2012

Bottom is painted!!!

It was a truly magical moment...

After three good solid coats of Baltoplate bottom paint, four coats on all leading edges, today was the day that I got a glimpse of what Mayhem! will look like when she's finished. Although the color of the bottom will change once it is sanded and burnished, the smooth lines and sleek appearance are starting to shine through.

While I waited for my final coat on the spots where the fore and aft trailer pads were, I started taking the tape off ever so carefully. Thankfully, I didn't lose any paint or have any tears or anything. It turned out TERRIFIC.

After I got all the tape off, I started taping again. This time, I'm prepping the toe rail to be painted this weekend. I tell you, no rest for the wicked!

Vioala! It is starting to look like a boat again!

After some wet sanding and burnishing, that reddish brown bottom should look slightly more gray.

Beginning to tape off the toe-rail for paint. I kinda like the blue/green stripes at the toe-rail. It could be a seahawks theme.
I feel like I am headed on a gentle downhill slope to completion. Assuming there are no unexpected disasters, I feel that I am pretty well prepared for all the steps remaining.

Tuesday, May 8, 2012

Painting the bottom...

Well... after another failed attempt at using my cheap HVLP sprayer to avoid sanding, I rolled on two good coats of Interlux Baltoplate bottom antifouling bottom paint today. Before applying the bottom paint, I had to completely sand the barrier coat Interprotect 2000e smooth. Once that was done, I took the boat outside and blew off the boat and trailer, then washed it all down with Interlux's special solvent wash.

A few observations...

1) I hate sanding more than anything... Period.

2) Baltoplate is ugly. It is a strange bloody stool brown color. It is supposed to burnish into a metalic gray, but I'll believe that when I see. Then again, I didn't buy this high dollar, high speed paint for its appearance.

3) Putting time and effort into prep will result in a much nicer paint job. With the exception of a few spots, which only I know about, the barrier coat and bottom paint went on perfectly. Anyone contemplating a project like this should take whatever time estimate you're thinking, triple it and add a week... and don't hold your breath.

4) You tend to be much more careful preparing paint, pouring paint, applying paint and cleaning up when it retails for $300/gallon! (in fact, I spent $5 on a snug fit pour spout top for the gallon container)

5) I hate sanding.

So my list of things yet to do continues to dwindle. As previously mentioned, I am not quite done with the bottom paint. I plan to put one more coat on, then I'll sand/burnish to finish it. I hope to be done with the bottom completely by Friday night.

My "best laid plans" moving forward are as follows

5/12-5/14 Spray out the cabin interior with 545 Primer, Awlcraft topcoat. (following my own advice regarding time planing above, I assume this will likely take me all week... but hey, I am an optimist.)

5/15-5/16 Paint toe rail.

5/17-5/20 tape off non-skid and apply Kiwigrip non-skid to decks and cabin sole.

5/21-5/27 Random crap that I can't think of right now that will need to be done.

5/28-6/3 Bed all hardware, stanchions, and reattach all wood trim.

6/4- RELAUNCH.

As I said, this is an optimistic timeline. I'll continue to work on this every night until I finish. Then I am going to launch it and throw a party!

Such a pretty boat. I love it. Ready to move it out and clean up.

After applying 5-6 coats of Interprotect 2000e, I sanded it smooth and prepared to apply bottom paint.

Sanding the rudder smooth. After sanding the hull overhead, laying this baby down on the workbench was like a walk in the park... a very dusty park.
With Craig and his tractor's help, I rolled the trailer and boat out of the shop so I could clean up the shop and blow off the trailer and boat.


This is about the most expensive pile of dust around. I estimate about $30-$40 worth of Barrier Coat found its way onto the floor via some 80grit and my ripped elbows and shoulders.


Once I blew off the trailer, I set to washing down the bottom with Interlux special solvent 216.

It was a bit breezy when I rolled out of the shop. My 1mil plastic was blowing around like a... well... like a sail.
Supposedly this stuff burnishes to a metallic gray... we'll see.

Here it is, Interlux Baltoplate Racing bottom paint. Good $tuff.

Midway through my first coat of Baltoplate. You can see the "attempt" at spraying on the plastic above the waterline on the port bow. Once I gave that up, it went on quite nicely with the roller.

This certainly isn't the worst "coating" that I've had over the last four months, but it did get a bit closer to my eyes than is generally recommended. Oh well... it washed off and I was no worse for the wear.


Wednesday, May 2, 2012

No... I haven't given up

Seeing as it has been about a month since my last post, I assume many followers have concluded that I bit off more than I could chew and have in fact, given up. While this is partially correct, I did bite off more than I can easily chew, I have not given up.

The keel fairing was a major pain in the asteroid... took forever. I can't count the number of small and large batches of fairing compound that I put on and then sanded off... wait, yeah I can... about $300 worth! Roughly two gallons worth. The keel is nearly perfectly faired and in much better shape than it started. Getting the radius where the keel meets the hull was a challenge but in the end, I think it is considerably better than it was previously. I owe a huge thank you to my friend Mitch Renella, skipper/owner of Skamokoa, an SJ24 in the Oak Harbor fleet. Without your help Mitch, I'd likely still be fairing that keel... or possibly collecting insurance money after an "accidental" fall off the trailer...

Between batches of filler, while waiting for it to dry only to be mostly sanded off again, I decided I would get a few minor things done to the cabin. As I began, I realized that I was going to have a beautiful and completely restored boat on the outside, with an old dingy drab cabin interior. Well... that just won't do. I figured "i've got the time between fairing coats to get things done up here...might as well" So... the interior was sanded back down to gelcoat, wood was stripped/sanded, I cut away a portion of the forward bulkhead to open it up, washed it down, blew it out and am now ready for a coat of 545 primer. Following a coat or two of good primer, I'll be spraying Awlcraft on the interior (we had leftover after painting top-sides)...

I am getting ahead of myself though. That is next week, hopefully. At the moment I am finished fairing the keel and in the process of laying down coat after coat of Interprotect 2000e epoxy barrier coat. Manufacturer suggest putting coats on until it is 10-12 mil thick. OK- I am putting my fifth coat on tomorrow and I will likely have enough material for a sixth coat. After that stands for 24 hours, and I've sanded it smooth (yay!!)  I'll be ready to start applying Baltoplate bottom paint. After a few coats of that, I'll be sanding again... my least favorite thing in life. Once I have a smooth finish, I'll be done with the bottom and ready to move up a bit.

I've still got to paint my toerail, lay down non-skid, spray the inside, then install all the hardware. I have missed all my timeline goals, and blown my budget completely out of the water but... well, who couldn't see that coming.

I am seeing the light at the end of the tunnel now though and I know the boat is going to be the best looking (and hopefully fastest) SJ 24 around. I'll add some pics and captions now so you can all see the progress.


Looks a bit different with a gray bottom... I kinda like it. The baltoplate will burnish to a grayish brown, but it won't be this sharp.

The keel after the only a couple applications of fairing compound... you can see it took a little practice to be able to lay it on smooth and thus avoid horrendous sanding.
The man who mad it happen for me... Mitch. Thanks for all your help!

Nearing completion. It may not look pretty, but it sure feels pretty!

Foil is pretty close to spot on from top to bottom (according to the CAD drawings anyway.. wherever those came from)

A couple blisters had to be "dealt with". In this case I removed the de-laminated area and re-glassed then faired smooth
Patch job once it had set up, before I set to sanding and fairing.

Taped off and ready to start applying barrier coat.

While I was waiting for my first coat of Interprotect 2000e to dry, I finished fairing the rudder.

First white coat of interprotect is applied. Had a few runs while I was getting used to the way it laid down.

A borrowed boat on a borrowed trailer in a borrowed garage. Man, I've got great friends!

My beautiful keel looks much better when it is all one color!

I wonder if the keel will ever be the difference between 1st and 2nd place?
 

First coat of gray interprotect is on. You alternate between gray and white so you can see where it isn't thick enough.

Half done with my third coat!

Rudder has two thick coats on and expect to lay at lease three more down.